


This post contains affiliate links. I could be an affiliate for many different products, but I chose these specifically because they are the products and brands I like and recommend. By using my links, you help support this website.
One of the best tools for creating your own patterns, I believe, is a custom dress form. A dress form made to fit your body. There are many ways of achieving this. A current, low-cost, trend at the moment is to make a dress form using duct tape and pillow stuffing.
When I began making my own wedding dress I decided that I needed to fulfill my “I should do that” goal of creating a custom dress form of my body. I scoured the internet for suggestions and tutorials. I wanted something sturdy that I could put pins in without tearing or warping the form.
Here are some of the tutorials I came across:
- Duct tape dress form: Handimania
- Orthopedic tape dress form: 3 part series from Katastrophic
- Foam dress form: A technique that requires a lot of materials and is expensive.
- Paper mache dress form: Threads
I was on a budget, but I wanted something a little sturdier than the duct-tape-dress-form appeared to be. I decided to try using the orthopedic tape version. I followed the tutorial from Katastrophic fairly exactly.
I want to share my process with you as well.
As you will quickly realize this process is a two person project. One person, this was me, is the body. The other person applies the orthopedic tape.
Step 1: Gather your supplies
- Bowls of water
- Plaster Bandages
- Drop cloth
- Towel
- Garbage bag
- Scissors
- A pair of bandage scissors, I used a large pair of wire cutters
- tight fitting tank top or well fitting bra
- Underwear or spandex shorts (these may get cut up, so preferably use a pair you are okay with loosing)
Step 2: Lay out supplies and workspace
Something I learned doing this was that once you’re wrapped up in the plaster tape and waiting for it to dry it gets very cold. Set up your work station in a warm room or near a heater of some sort. I also stood near a tv so I was able to watch a few shows while standing completely still. Again, another reason to have a project buddy. They have to do everything for you. You stuck in an almost full-body cast.
Lay the drop cloth out on the floor of your workspace. This is a messy process so be sure to work in a place that will be easy to clean up.
Set bowls of water on drop cloth or near your work area for easy access.
Cut the plaster bandage tape into strips about 12″ to 16″. This will speed up the application process and make it easier on your project buddy.
Step 3: Get ready to wrap
There are multiple different ways to dress for getting wrapped up. I put on a bra and then wrapped a garbage bag around my torso to cover the bra (I didn’t want to ruin it). I wore a pair of underwear I could get rid of after the dress form making.
Other ways of doing this are to wear leggings and a tank top that you can cut through and get rid of. Or even applying the plaster bandage tape to bare skin.
I suggest using petroleum jelly or some sort of skin moisturizer that is not water-based to slather over your skin for all of these techniques, especially if you are going with bare skin. Later as my sister cut me out of the form the tape had stuck to my skin. It was like tearing off a band-aid over every part of me that wasn’t wrapped in the garbage bag. Painful.
Note: try to wear garments that are fitted but don’t create unnecessary bulges or creases in your skin. Your final product will show these lines and it can be frustrating to work with.
Step 4: Standing…..for a long time…….
As your project buddy starts to apply the wet plaster tape you will have to stand completely still. Seriously. I kept moving slightly and taking big breaths. In the end, the chest cavity was larger than my bust because I was expanding so much to breathe. It will feel slightly claustrophobic.
Be prepared to stand still for the entirety of the application process as well as allowing it to dry. We went slowly on mine because we weren’t sure what to do and I had to explain the process to my project buddy as I went. In all, it took about two hours of application and at least three hours of drying before I was able to get out.
Step 5: Applying plaster tape
Your project buddy will be applying the plaster tape in layers to build up the strength of the mold. Each piece of the plaster tape needs to be dipped into the water to dampen the plaster and then applied to your body.
Start at the shoulders draping pieces over and then wrapping around the neck to meet. As you lay the damp tape pieces onto the body gently smooth them down with your hand activating the plaster so that it sticks to pieces underneath and fills in the mesh base of the tape.
Bring the tape over the shoulder cap and down the arm about one inch. Continue to wrap and layer the pieces of tape over the chest and upper back. Keep a good tension on the tape as you smooth it against the body. The closer the fit, the more accurate your final dress form will be. When you reach the bust contour the tape to lay flat against the curve of the body. A good way to start is by creating an “x” with long strips of tape between the breasts and build off of these tape pieces.
Keep wrapping and laying down strips. Alter the direction of the tape so the density and structure are strong. Lay some diagonally, vertically, horizontally… It doesn’t have to look organized. The goal is to have a good solid build-up of layers of tape by the end.
I had my sister continue to wrap around my hips and then the upper part of my thighs. In the posts by Katastrophic you can see that they did their legs separately and then joined the two together. Depending on what you want your end result to be (full leg, or part leg) try either way.
Step 6: Drying
Stand still and wait. The form may seem to get a little tighter as it drys. The plaster is shrinking down as the water evaporates out of it.
Use a hairdryer to speed up the process as the shell reaches an “almost” drypoint. When it’s solid and isn’t damp that’s when it’s done drying.
Step 7: Cutting you out
Be careful! Even with being super cautious my sister accidentally nicked me with the scissors. And no, it wasn’t payback for anything. The form should be tight to your body which makes the cutting process challenging. Go slow. Take small snips and it will go smoothly.
Cut up both sides and at the top of the shoulders. Because I did part of my legs as well I had to wiggle out of it without cracking or damaging it and then cut the section between the legs. I ended up with two halves. Gently pull the form apart and wiggle yourself out of it. Don’t pull too hard, you don’t want to crack or break it. All your hard work would be for nothing. Trust me after standing there for hours you will want this thing to turn out.
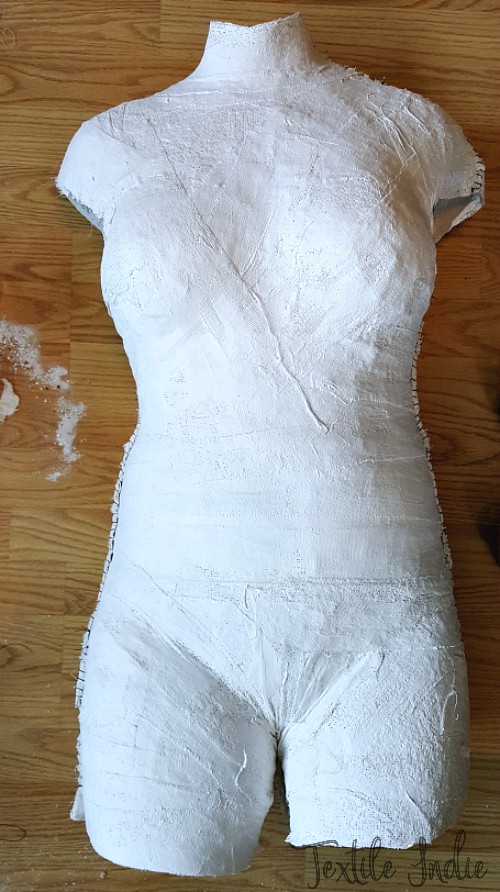
Step 8: Finish drying
Lay the two sections down in a safe place to finish drying. Support the edges so they maintain the correct shape by placing books, bottles, or other objects around each side. Allow sitting for at least twenty-four hours. If it still feels damp after that allow it to continue to dry.
I found a couple of places that were a little thin. I layered a few more pieces of plaster tape in these places and let them completely dry before moving on.
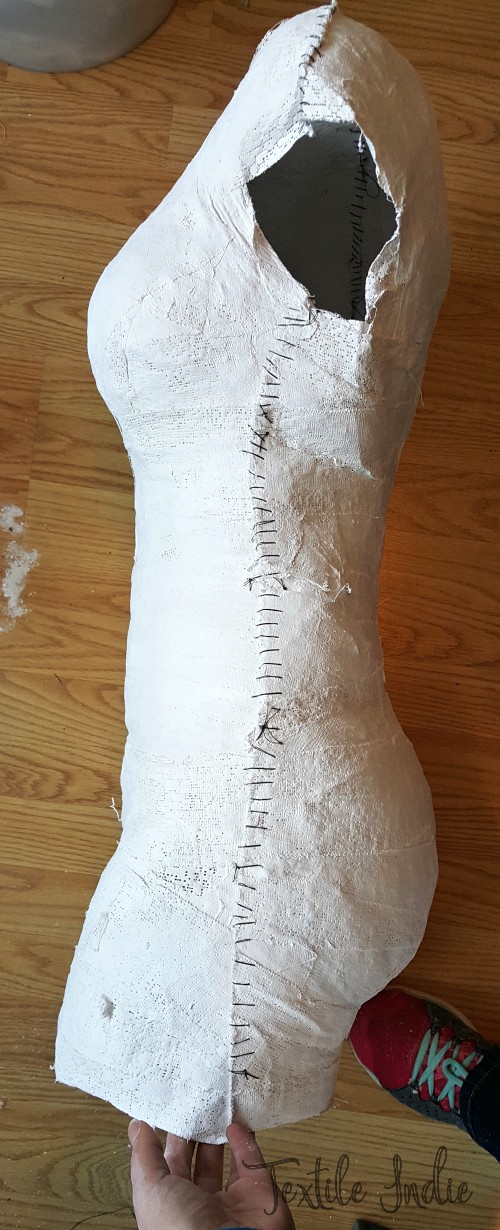
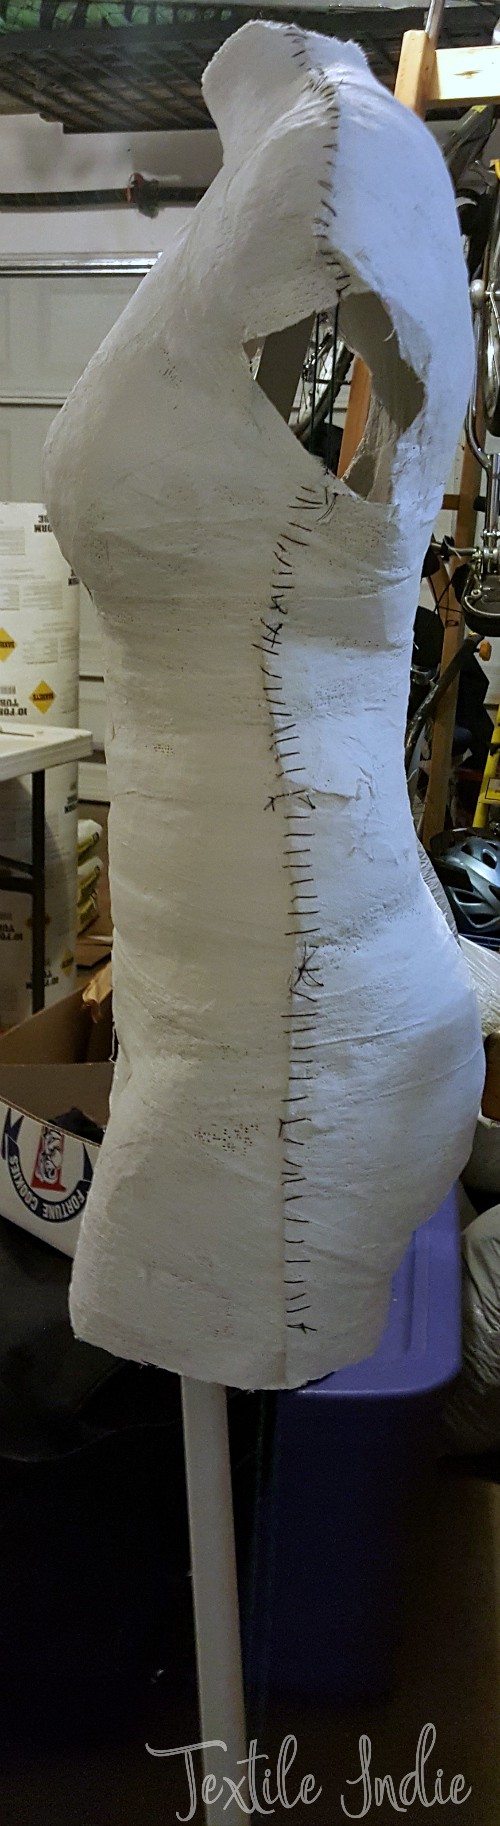
Step 9: Sew pieces together
When I stitched the two sections of the plaster tape mold together I overlapped the edges slightly making it a bit smaller. It had become loose while drying.
The thread wouldn’t pull through the plaster tape at first so I found some candle wax and ran the thread over it to coat the fibers. I think technically I should have used beeswax, but I didn’t have any so I made due.
I used a simple whip stitch to sew the halves together. Coming up on one side and down on the other.
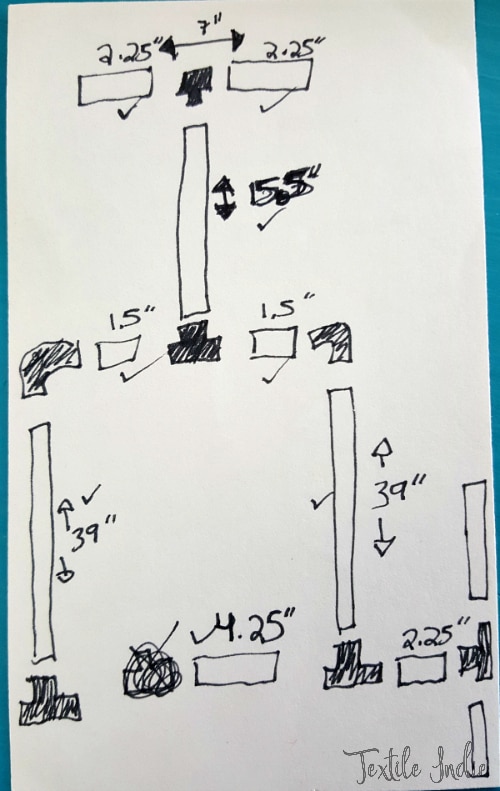
Step 10: Create form stand
Again, Katastrophic has some really good pointers and tips for building the stand.
Cut your PVC pipe to the correct lengths and put it together using all of your joining pieces.
Step 11: Gluing form stand
This is super important! Glue the pieces of the stand together. I didn’t glue mine together securely enough and later as I was using it the form kept falling forward or backward because of the weight of the body on the base of the stand.
Step 12: Setting mould on stand
The key to setting the mold on the stand is to lift the mold on the stand as if it were floating inside the body.
Step 13: Prepping for foam
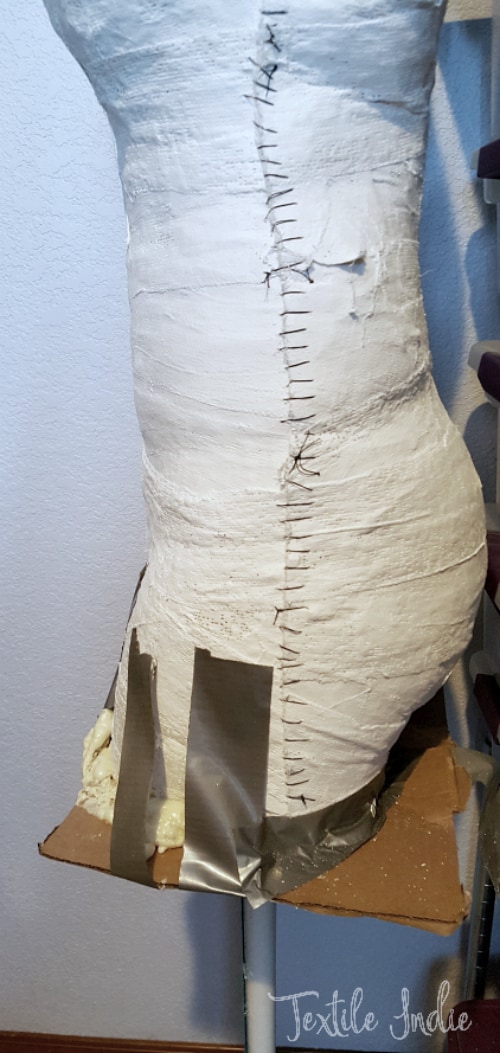
Set your suspended form and stand on a large piece of cardboard or another disposable surface. The foam expands, drips, and gets everywhere. Prepare for it and it will be fine. Also, another warning. If the foam gets on your hands it is very difficult to get off. I had it on my hands for about two weeks before it had all worn off. Soap and water doesn’t work, either does rubbing alcohol, or mechanics hardy soap. Wear gloves of some sort.
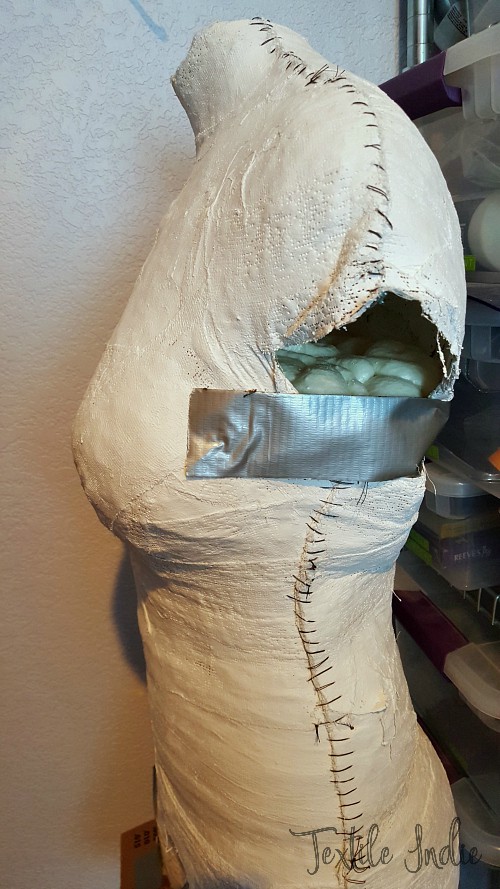
I cut cardboard pieces and cut out a hole in its center to stick under each leg to hold in the foam. I duct taped these to the thigh to hold them in place.
Step 14: Filling form with expandable foam
Use an expanding foam to fill the mould. I got six spray cans of expanding foam.
Touch ‘n Foam 4001031212 MaxFill Maximum Expanding Sealant![]()
The number of cans you need depends of course on your body size. I’m around a size 8, as a reference point.

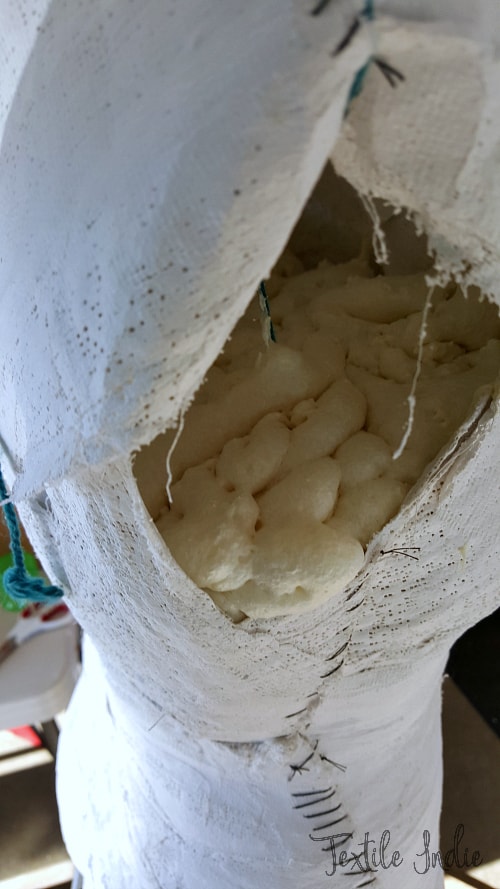

Step 15: Letting foam set
I began filling the form with foam. I did one bottle at a time. When one bottle was empty I let that amount of foam expand and set before doing another can. The drying directions will be on the back of the can of spray foam. I added additional time because the estimated time on the bottle is for thinner layers. I let each section set up for several hours before adding more. This also allowed the foam to expand which gave me a better idea of how much foam I needed to add.
Step 16: Removing mould from foam
Once the form is full of foam and has completely dried then you take off the mold. This proved to be a process. All of that lovely mold that you created has to be ripped off. It was a bit brutal. It took me using a pair of pliers to grip the plaster tape and pulling hard to start to tear away the shell. My brother happened to be keeping me company at the time and enthusiastically pitched in to help yank and tear of the plaster pieces.

Step 17: Cleaning up form
After all the plaster tape has been removed do some cleaning up. The foam underneath may need some smoothing. I did some slight shaving with a sharp knife. Don’t do too much, the raw foam is messy.
Step 18: Covering with batting
I covered my form with a thick batting (almost felt) to pad the form. To make a nice finished piece stitch the pieces of batting together as you wrap them around the form and fit them. I simply pinned my pieces to the form lining up batting edges so that they butted up against each other and didn’t create lumps.
Step 19: Option to cover with a cloth layer
Catastrophic has really good information on creating the cloth bodysuit for your form. I chose not to do this step. I was in a hurry to get going on draping my wedding dress. Definitely cover the form with batting before using it, but I found that having the batting (mine was more like a thick felt) was useful for holding fabrics in place.
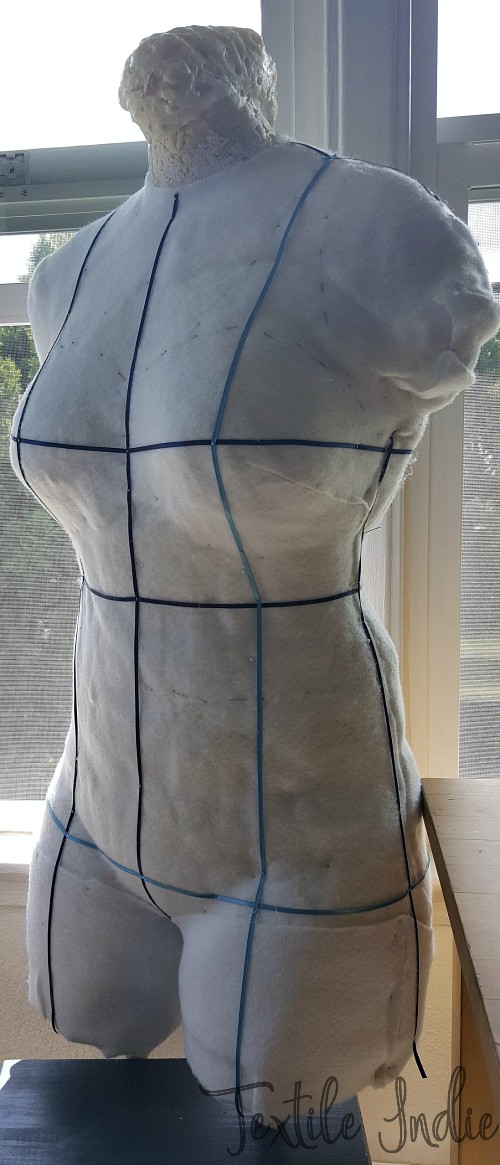
Step 20: Pinning on contour lines
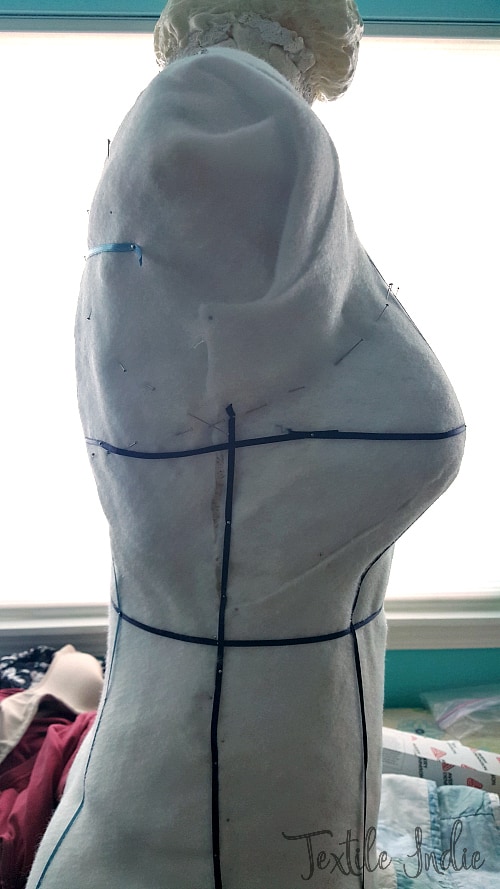

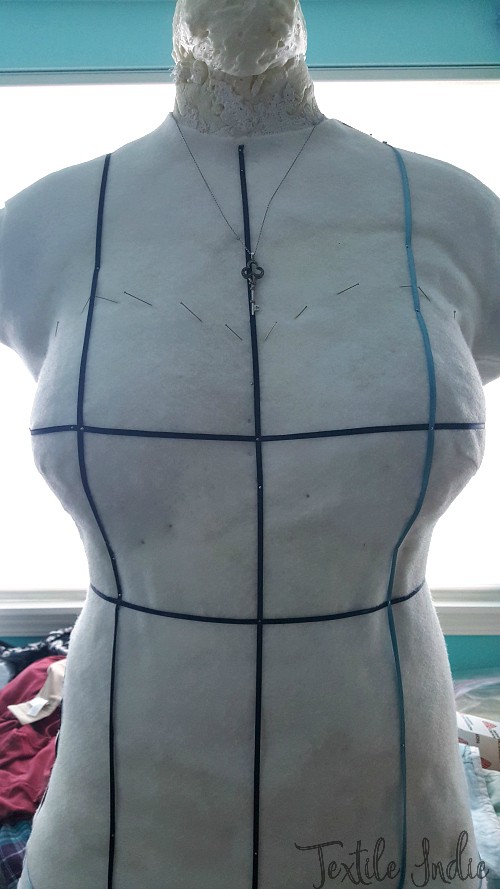
And thats how I made my dress form. Thanks for reading!
This post contains affiliate links.
