• Skip to main content
  • Skip to header right navigation
  • Skip to after header navigation
  • Skip to site footer
  • Facebook
  • Instagram
  • YouTube
    Textile Indie

    Textile Indie

    • Meet Brittany
    • Blog
    • Work With Me
    • Resources
    • Shop
    • Basketry
      • Pine Needle Basketry
      • Rattan Basketry Resources
    • Spin
      • Spinning Resources
    • Dye
      • Ice Dyeing
      • Natural Dyeing Resources and Info
    • Print
      • Block Printing Resources
    • Sew
      • Sewing Resources for the Home Sewist
    • Felt
    • Videos
    • Basket a Month Club
    • Courses

    Winding a Yarn Skein into a Yarn Ball

    You are here: Home / Spinning / Winding a Yarn Skein into a Yarn Ball

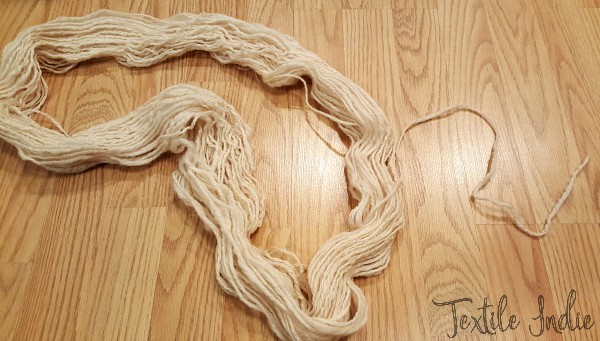
    As a hand-spinner, I create many skeins of yarn from a variety of fibers. After spinning a bobbin full of yarn the easiest way to remove it is to wrap it onto a Knitty-noddy. However, this is not a productive way to use the yarn when knitting it into a project. That is when turning a skein into a ball of yarn becomes a necessary skill to know. 

    Skein of yarn.
    A skein of yarn.

    Tales can be told of the many knitting, crochet, and other yarn projects I’ve attempted only to get stuck in the middle of the project with a knotty, rats nest, bunch of yarn which leads to enormous frustration and the ingredients for procrastination and putting the project away in the “projects-to-do-later” box.

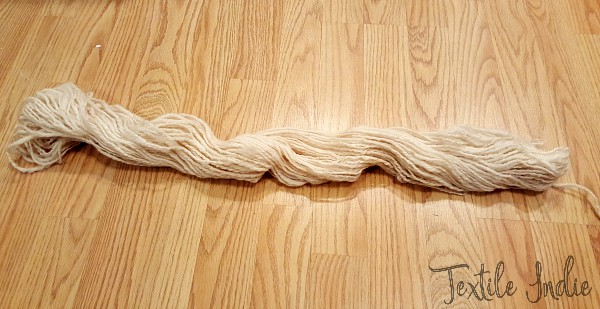
    The first step in turning the skein into a yarn ball is to open up the twisted skein and finding the end.

    Untwist the skein.

    Untwisting yarn skein.
    Untwisting yarn skein.

    Find the center of the skein.
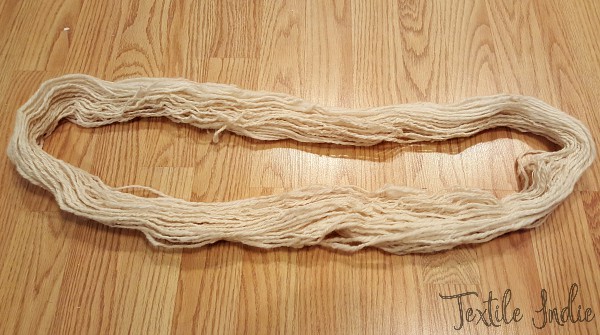
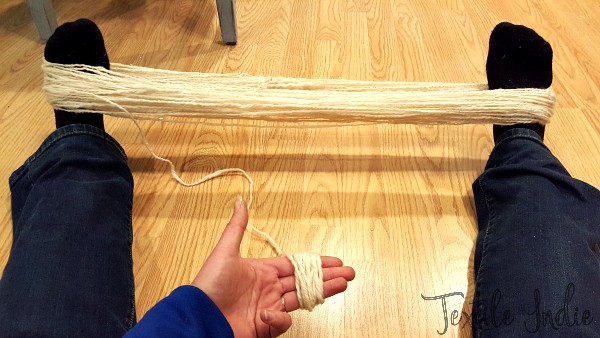
    Separating yarn sections.
    Separating yarn sections.

    Find the yarn end.

    Finding the end of the yarn.
    Finding the end of the yarn.

    If working with a partner have them hold the skein taut in the center.

    Working with a buddy.
    Working with a buddy.

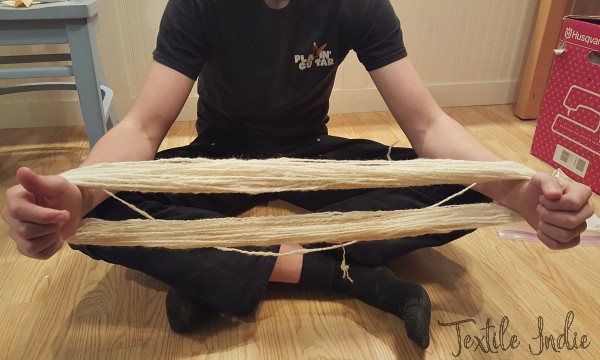
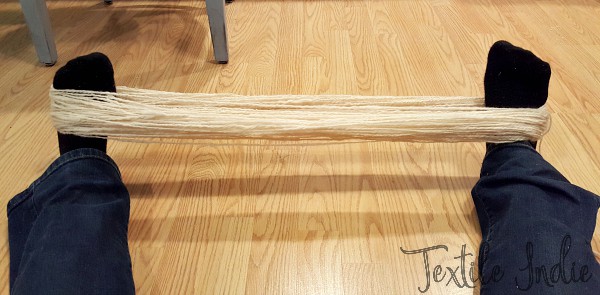
    When I do this alone I either stretch it between two objects or place it around my feet. This is how I’ll be demonstrating the process.

    Using your feet to unwind yarn.
    Using your feet to unwind yarn.

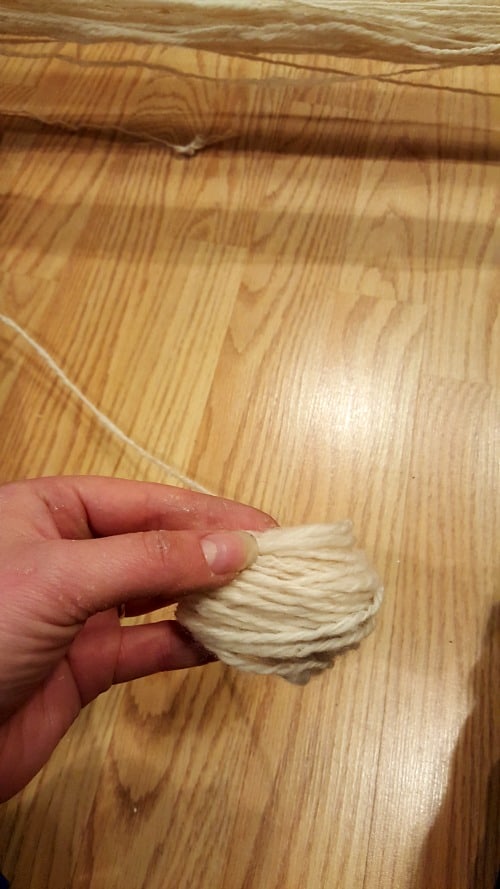
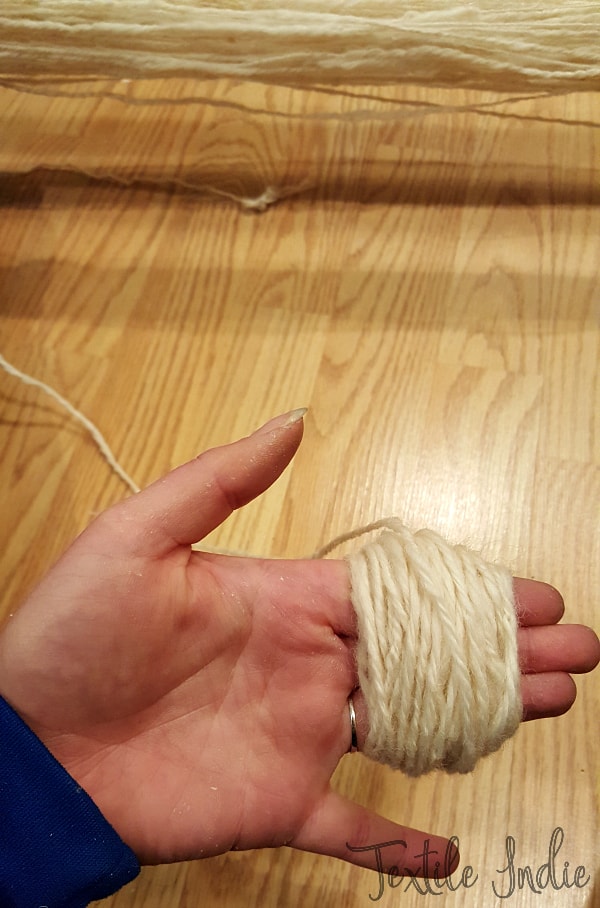
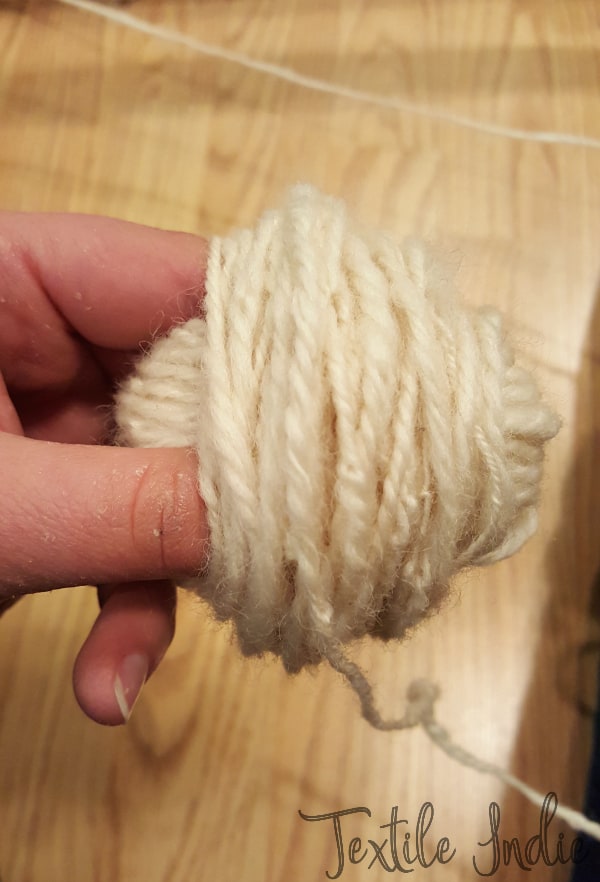
    With the end of the line start to wrap the yarn around three fingers. The tension should allow your fingers to move slightly.

    Beginning to wrap the yarn around fingers.
    Beginning to wrap the yarn around fingers.

    Wrap enough yarn around your fingers in this position so that you have a substantial amount of yarn without it overwhelming your fingers.

    Wrapping foundation of yarn ball.
    Wrapping foundation of yarn ball.

    Carefully remove the wrapped yarn from your fingers and rotate it slightly to change the direction the yarn is going.

    Remove yarn from fingers and rotate ball to begin next section of wrapping.
    Remove yarn from fingers and rotate the ball to begin next section of wrapping.

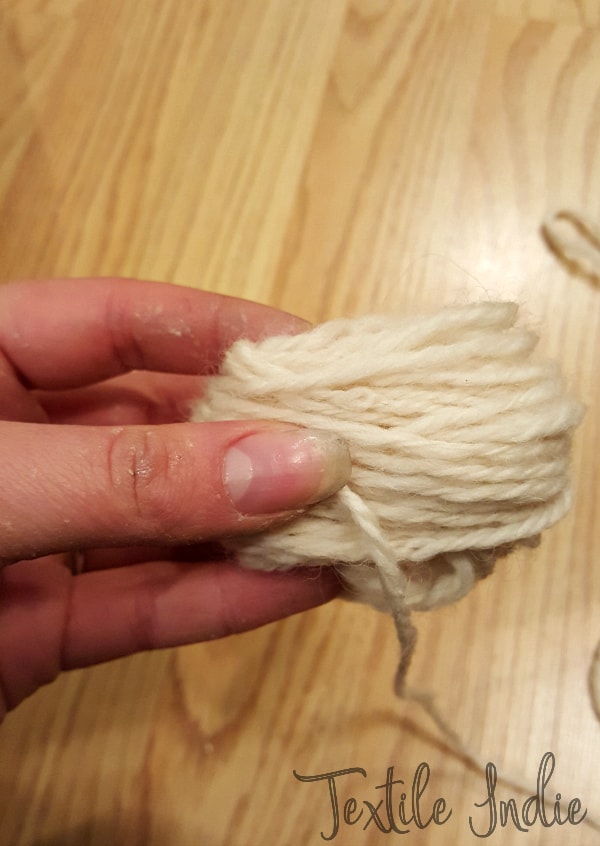
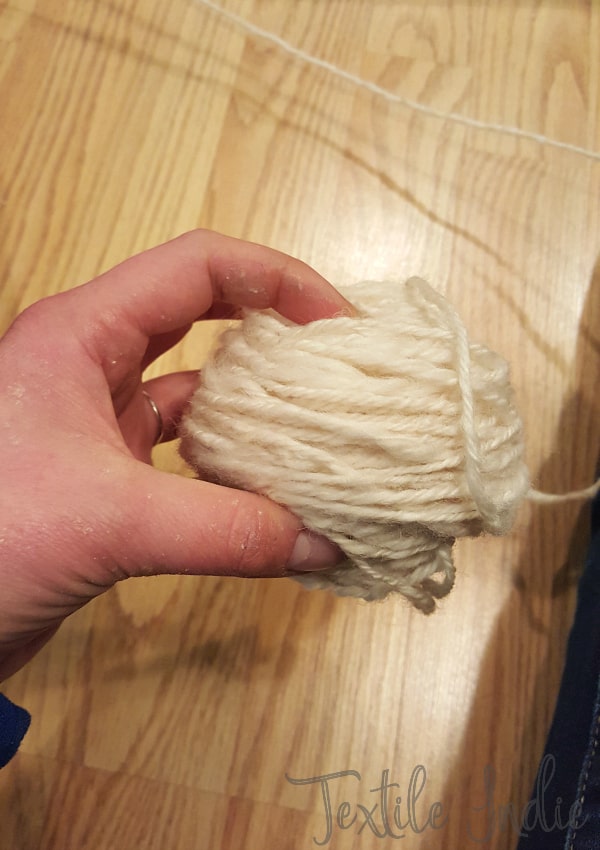
    Start to loosely wrap the yarn in the same direction as before. The yarn should be perpendicular to the last section of wraps you’ve done. Wrap four or five times.

    Second section of yarn wrapping.
    The second section of yarn wrapping.
    Wrap yarn over fingers to keep ball loose.
    Wrap yarn over fingers to keep the ball loose.

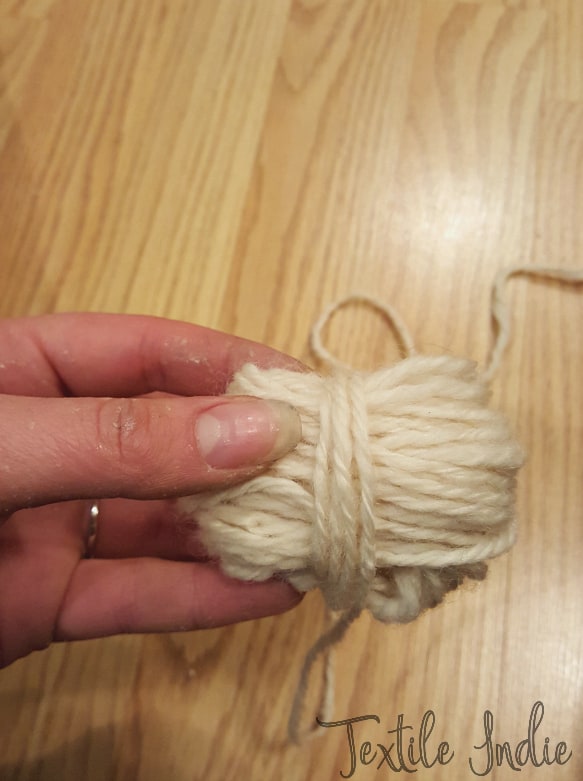
    Continuing to wrap in the same direction adjust hand position so that the yarn is getting wrapped around your fingers holding the ball. This will create a loose ball which will keep the yarn from stretching out and allows air through the ball so the fibers can breathe (this is important for natural fibers).

    Second section of yarn wrapped.
    The second section of yarn wrapped.

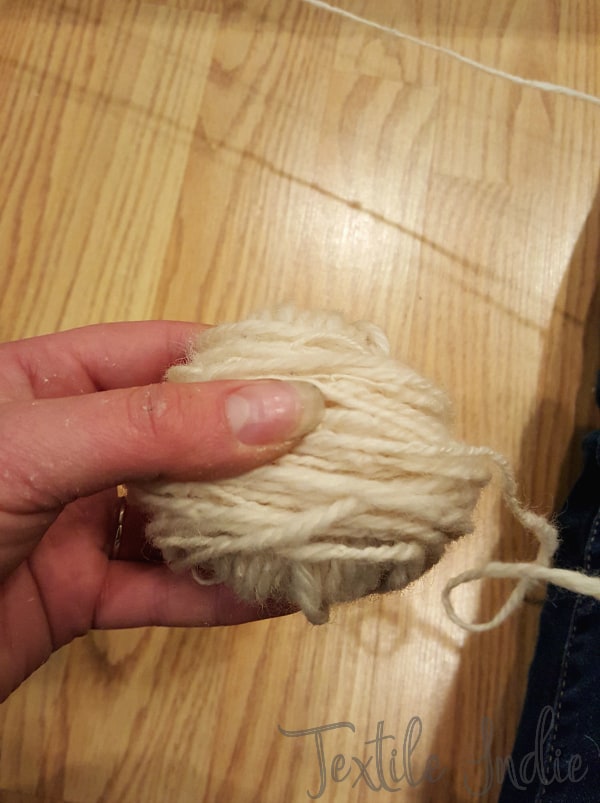
    Wrap until there is enough yarn built up in the center of the ball.

    Second section.
    Second section.

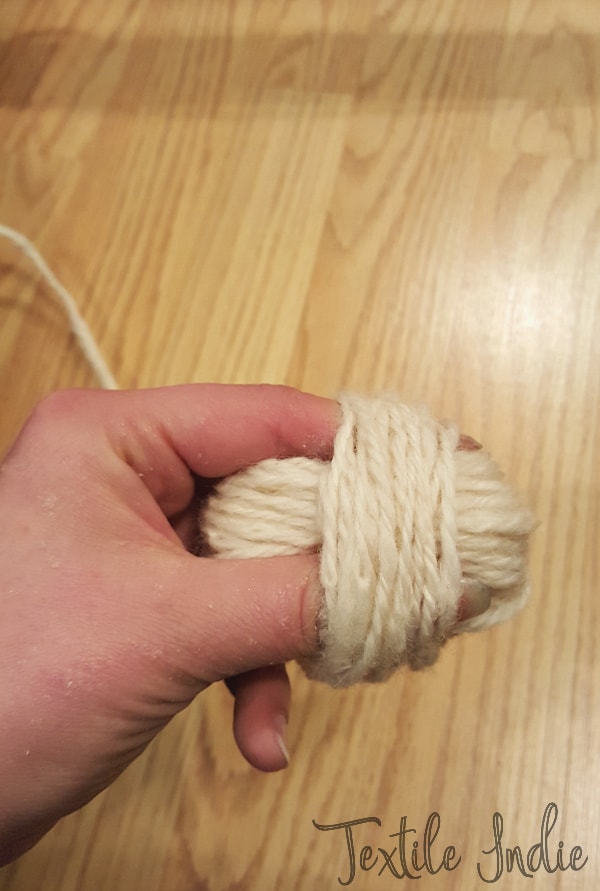
    Again, rotate the ball so that the last layer is perpendicular to your fingers.

    Start to wrap the yarn loosely around the ball.

    turned for third stage
    Second section of yarn wrapping.
    The second section of yarn wrapping.

    Build up the layer until there is enough yarn to create a thick layer without falling off either side of the yarn ball.

    Building up the ball.
    Building up the ball.

    Continue this process until all of the yarn in the skein has been wrapped up into the yarn ball.

    Wrapping the last of the yarn.
    Wrapping the last of the yarn.

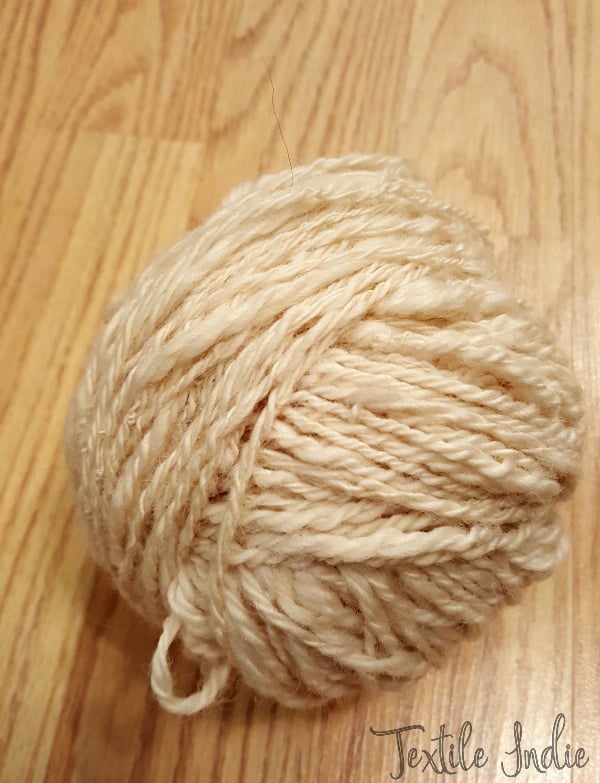
    The final outcome should be a neat and tidy ball of yarn.

    Yarn ball.
    Yarn ball.

    Sidebar

    Meet Brittany

    Work with Me

    Legal Information

    Textile Indie is a participant in the Amazon Services LLC Associates Program, an affiliate advertising program designed to provide a means for sites to earn advertising fees by advertising and linking to Amazon.com. Textile Indie also participates in affiliate programs with CJ, ShareASale, and other sites. Textile Indie is compensated for referring traffic and business to these companies.

    About Brittany

    Privacy

    Work with Me

    Free Community

    Follow on Social

    • YouTube
    • Instagram
    • Pinterest
    • Facebook

    Resources

    Favorite Tools and Supplies

    Etsy Shop – Basket Supplies

    Basket-of-the-Month Club

    Video Basket Courses

    Copyright © 2023 · Textile Indie · All Rights Reserved · Powered by Mai Theme