


This post is the second in a series I’m doing on how I created my wedding dress. To see part 1 of the series go Wedding Dress Part 1: Trying on Dresses.
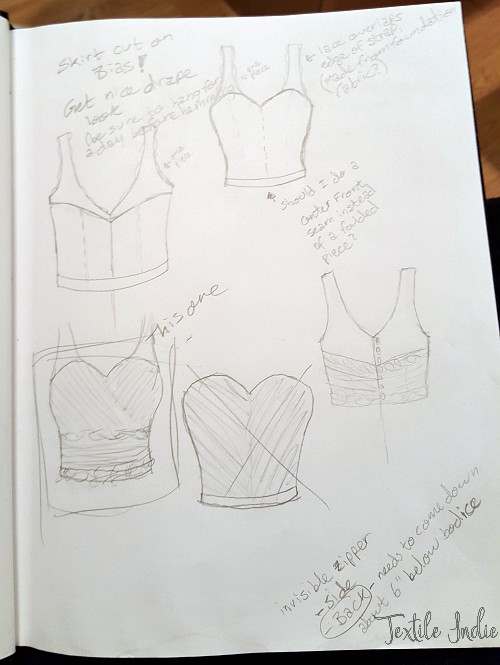
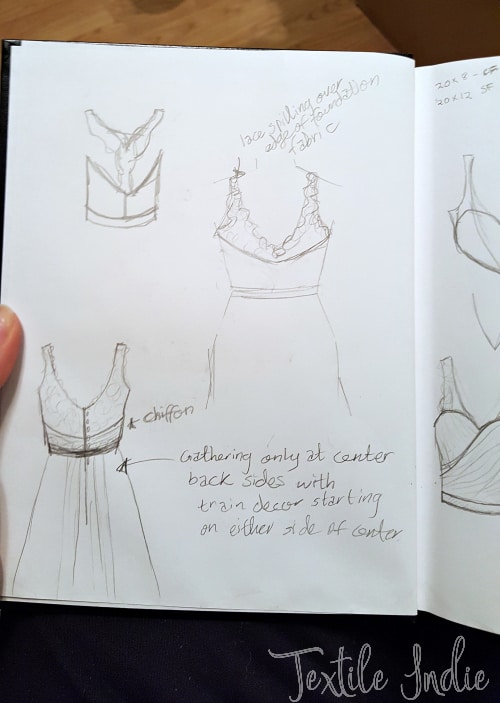
I sat down with my sketchbook and started to play around with different ideas for each part of my dress. The elements that I liked in the dresses I tried at Davids Bridal got incorporated into different sketches as I played with ideas and designs. I used my pencil to lay thoughts out into pictures as well as jotting down ideas next to each sketch. I love using arrows and putting a quick note down to further explain a sketched idea.

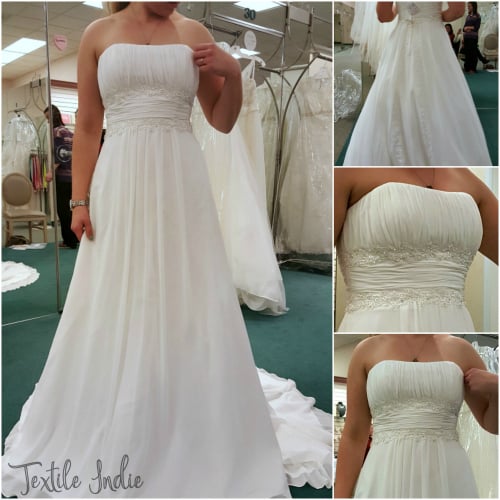
I used the inspiration dress (I wrote about that here) as inspiration for the overall look of my dress. I liked the skirt because of the fluidity and simple elegance. I also loved the defined waist with the ruched waistband and lace accents. Another thing I really liked about this dress was the gentle sweep train.
I had a couple of other photos I really enjoyed as design inspirations that I found in my adventures on Pinterest (go to my Pinterest Wedding Dress board to see these).
Being able to do whatever I wanted was an exciting concept. I had no boundaries. My limitations were budget (but I wasn’t planning to use super spendy fabrics) and my own draping skills.
Over time my dress began to take form in my brain and appear in my sketches.
Here are the first versions I sketched
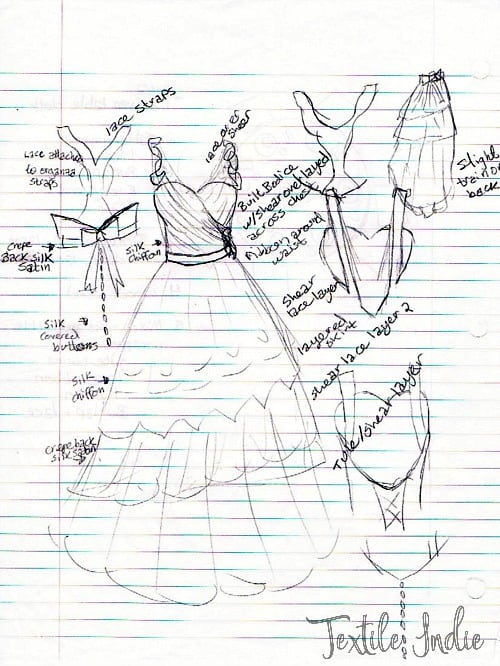
When I had pages of sketches and a Pinterest board full of photos I started draping. I’ve discovered that I like to start with a general direction in mind, but during the draping process, I play around with different ideas and adjust and recreate my designs as I go. Come see Part 3 on how I did the draping process.