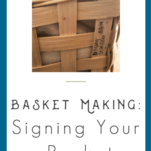
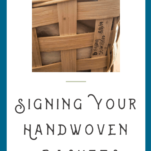
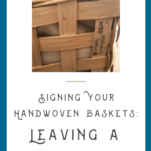
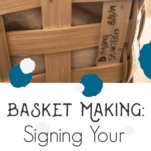
The tradition of signing your basket is a cherished one. It’s a way for artisans to leave their mark on their creations.
(For a complete guide to all Textile Indie’s basket weaving posts and videos, visit the main Basket Weaving Page.)
Why sign your handwoven basket?
Basketry is an art form, and most artists sign their work.
Basket weavers sign their work as evidence that they created the piece. By signing a basket, the weaver adds value and the legacy of tradition to their handmade object.
Here are a few reasons to consider:
First, sign your creations for yourself. Signing and dating the baskets you make is important as a creator because you’ll be able to look back at your progress as a weaver.
Second, sign your basket to mark it as something you created. For the same reasons an artist puts their mark somewhere in a painting, a basket weaver leaves their mark on a basket. It proves authorship.
Third, signing a basket signifies to yourself and the world that you’re “finished.” As the creator of the piece, you are satisfied with the work you did today. It’s an essential mindset for an artist to honor their process and skill evolution.
Fourth, if you plan to give the basket as a gift, signing it adds a unique element for the recipient.
Finally, by adding your signature to your lovingly created basket, you mark it as a handmade piece, separating it from the mass-produced items found at the local craft mart.

Do you want the best resources, tools, and products for fiber artists?
Every other Friday, I send an email chock full of fiber craft inspiration for you to explore.
Each issue focuses on one fiber art skill – spinning, dyeing, basket weaving…
What to use to sign your basket
There are several options for signing a basket, but no matter what method you choose, the most important thing to remember is to use high-quality permanent ink.
Method 1: Markers
Suggested permanent markers
Sharpies
Micron pens
Method 2: Wood burning
Use the writing tip with a wood-burning tool to leave an indelible and rustic mark on your baskets.
Wood burning will work best on a solid wood basket handle. If you decide to burn your initials into the reed, be careful, you’ll want to sign while the basket is slightly damp. No one wants your basket to go up in flames!
Suggested wood-burning tool:
The Walnut Hollow Creative Versa – Tool is an excellent choice for crafters. It’s inexpensive and includes 11 different tips, a stand, and temperature control.
Method 3: Rubber stamps
Another fun idea is to create a custom rubber signature stamp and use it on all your basket projects. You can create a logo, symbol, or stylistic signature to suit your taste.
I have a video tutorial on creating rubber stamps; it’s fun and easy.
Be sure to use permanent ink.
Method 4: Paint pens
Paint pens are another great option. They’re similar to permanent markers, but paint pens are the way to go for a metallic finish.
These Sakura pens come in copper, gold, and silver. You can also get fluorescent and ultraviolet colors (to each her own). The ink is archival and waterproof. If your basket ends up in a museum in 100 years, your signature will probably be visible!
Method 5: Metal tags
I love these custom hand-punched brass tags on Etsy:
Method 6: Tooled leather label
Commission custom leather labels. Here’s my choice on Etsy:
For makers that love to work with ALL the materials, make your own. Blick Art Supply has everything you need.
Tooling leather
Leather tooling set
Rotary leather punch
Rivets
How to sign a basket
Allow the basket to air dry thoroughly.
If you stain the basket, do so before adding a signature.
Sign, stamp, or add your custom tag.
Special notes:
Wood-burning tools will be safest if the basket is still retaining a tiny amount of moisture.
A clear coat protectant can go on after the permanent marker, paint pen, rubber stamp, or wood-burned signature.
Here is an example of using a Sharpie pen – quick and straightforward.

For a complete guide to all Textile Indie’s basket weaving posts and videos, visit the main Basket Weaving Page.
More basket weaving techniques:
How to Cut Reed for Basket Stakes
How to Weave an Open Basket Base
How to Weave a Closed Basket Base
Twining a Basket Base: Creating a Stable Basket
Weaving Techniques for Basket Making
How to Set Up the Rim of a Basket
How to do Basic Lashing on a Basket Rim
How to do Cross-Stitch or X-Lashing on a Basket Rim
How to Protect Your Handwoven Baskets from Mold
Basket Stains and Sealers: Finishing Your Basket
Basketry Immersion: A Year-Long Journey
Check out Textile Indie’s self-paced basket program if you want to learn to weave beautiful baskets.
Twelve different basket designs with video and written instructional support to learn foundational basketry techniques.
Over the course of twelve months, you will receive one basket pattern and a video with supporting instructional material each month. Start at basket one and weave all twelve.


