This post contains affiliate links. I could be an affiliate for many different products, but I chose these specifically because they are the products and brands I like and recommend. By using my links, you help support this website.
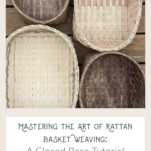
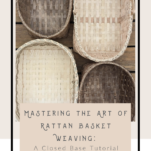
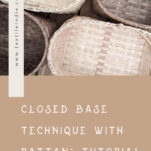
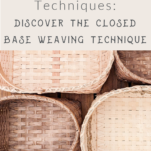
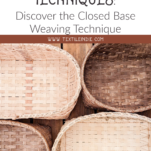
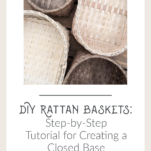
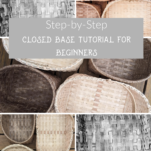
The closed basket base is a fundamental basket weaving technique, offering aesthetic appeal and structural integrity.
(Visit the main Basket Weaving Page for a complete guide to all Textile Indie’s basket weaving posts and videos.)
What is a closed basket base?
A closed basket base is the bottom of a basket, woven so there are no gaps between stakes.
Closed base baskets are best for carrying and storing small items.
If you prefer a basket with maximum breathability, consider an open base basket.

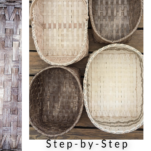
Closed base market basket
Use the directions below to create a closed base for your basketAll other steps areps explained and demonstrated in my Step-by-Step Guide to Weaving a Handled Basket.
Substitute the following instructions for the open base instructions described in the handled basket tutorial to create a closed base version.
Gather tools and materials
Tools
You will need a few tools to create your closed basket base:
- 2 towels
- Water tub
- Cloth measuring tape
- Reed cutters
- Pencil
- Spoke weight
- Spray bottle
Materials
I am using a 3/4″ flat reed for the basket base demonstrated in the photos below. The width of the reed you start with will depend on what size or style of the basket you are weaving.
Check out the Textile Indie Shop for reed and basket supplies.
Setting up to weave the closed base
Set up your workspace.
Before you begin weaving, lay a towel down on your work surface. The towels catch any excess water as you work with the wet reed.
Set another towel down to one side and place a bin of warm water on top of this towel.
Finally, lat your tools within easy reach where they won’t be in your way.
For details on my tools, visit the post: Basket Weaving Tools: What you Will Need to Get Started.

Find a complete list of basket terminology:
Cut stakes
See my post, The Beginning of it all…Learn to cut basket stakes for more information.
I use a pair of reed cutters like these:
You will need two sets of stakes for the closed base basket: horizontal and vertical. Cut the stakes to the measurement of your pattern or custom design.
You will also need a set of stakeo between the horizontal stakes. Cut these stakes five inches longer than the completed base of the basket.
For example, if you are weaving a 10-inch wide basket, you would cut these stakes to 15 inches long. The five excess inches will be divided between the two ends and form the ‘crow’s feet’ pattern shown below.

Mark centers
Mark the halfway point on all stakes, and make the marking on the wrong side of the reed.
The wrong side of the reed is rougher, and the right side is smooth and looks less “hairy.”

Place the stakes in water to soak for a few minutes.


Weaving a closed base
To weave a closed base basket, you will work with three sets of stakes: vertical, horizontal, and filler.
Laying out the stakes
Start by laying the horizontal stakes parallel to each other. Lay the stakes so that the center mark faces up, and the marks on all the stakes line up.
Space the stakes, so there is about a stake width between each horizontal stake. You can adjust this as the base comes together, so don’t stress about making it perfect.

Do you want the best resources, tools, and products for fiber artists?
Every other Friday, I send an email chock full of fiber craft inspiration for you to explore.
Each issue focuses on one fiber art skill – spinning, dyeing, basket weaving…
Adding in the filler stakes
Between each of the horizontal stakes, place a filler stake. Lay them down with the center mark facing up and lined up with the horizontal stake center marks.
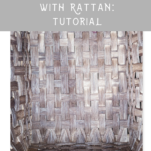
The base should have horizontal stakes on both outside edges and filler stakes between each. The filler stakes go on the inside of the horizontal stakes. See the image below (disregard the handle).

Weaving in the perpendicular stakes
Add the perpendicular stakes once the horizontal and filler stakes are laid out. Now, the weaving begins.
If you include a handle, as demonstrated in these photos, weave the handle so that the outer horizontal stakes are underneath the handle. All the filler stakes are going over the handle.
Adjust the hande, so it sits right over the center marks – center marks lining up with the middle of the handle base.
If you are not using a handle, weave stakes by starting at the center mark and working out one way and then from the center and the other way.

Square the base
Using a tape measure, evenly space the stakes you wove into the base.
Do this on both sides.
Cutting and tucking for crow’s feet
If the center mark on these stakes is lined up with the center mark on the horizontal stakes, the filler stakes should be about 2.5 inches past the last vertical stake. See the image below.
Once the base is squared and adjusted, go along the base and fold the filler stakes up against the last vertical stake edge. Folding creates a gentle crease to create the ‘crow’s feet.’
The reed needs to be damp for the fold-up.
Once all the stakes have been folded over, use the reed cutter and cut the filler stake end in half from the end to right against the vertical stake. See the image below.

When all the filler stakes are split on the ends, use the straight-tipped packer to guide the ends underneath the second vertical stake from the edge.
The ends will fold over the first vertical stake, extend out and on either side of itself, and get tucked under the second upright stake on either side, creating a v-shape, what is called ‘crows feet’ (also called ‘chicken feet’ or ‘hen scratch’).


Do this tucking process across the basket on both sides.
Final check
Double-check that the basket’s base measurement corresponds with the basket pattern’s base measurement.
More basket weaving techniques:
How to Cut Reed for Basket Stakes
How to Weave an Open Basket Base
Twining a Basket Base: Creating a Stable Basket
Weaving Techniques for Basket Making
How to Set Up the Rim of a Basket
How to do Basic Lashing on a Basket Rim
How to do Cross-Stitch or X-Lashing on a Basket Rim
Signing Your Handwoven Baskets: Leaving a Legacy
How to Protect Your Handwoven Baskets from Mold
Basket Stains and Sealers: Finishing Your Basket
More information
How to Weave an Open Basket Base
Basket Weaving Tools: What You Will Need to Get Started
Twining the Base: Creating a Stable Basket
For a complete guide to all Textile Indie’s basket weaving posts and videos, visit the main Basket Weaving Page.
Basketry Immersion: A Year-Long Journey
Check out Textile Indie’s self-paced basket program if you want to learn to weave beautiful baskets.
Twelve different basket designs with video and written instructional support to learn foundational basketry techniques.
Over the course of twelve months, you will receive one basket pattern and a video with supporting instructional material each month. Start at basket one and weave all twelve.