This post contains affiliate links. I could be an affiliate for many different products, but I chose these specifically because they are the products and brands I like and recommend. By using my links, you help support this website.
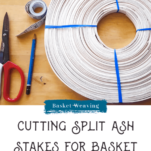
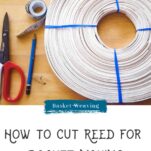
Cutting reed accurately is essential for successful basket weaving. In this tutorial, we’ll show you how to cut reed effectively for basket stakes.
For a complete guide to all Textile Indie’s basket weaving posts and videos, visit the main Basket Weaving Page.
The first step in basket weaving – preparing the reed
There’s something special about creating with your own hands. The slowness of the process, thinking through every aspect of your creation, realizing the time and effort things take, and appreciating the skill they require is an invaluable experience.
I am somewhat of an addict when it comes to this. I’ll complete a sewing project, dye pot, or theatre performance only to anticipate the next creative pursuit. I love testing my creative limits.
Once something is completed, you get to go back to the beginning and begin anew. It’s like Springtime.

In basketry, going back to the beginning for me always means deciding the shape, style, or purpose of my next basket. Next comes the design and measurement calculations.
Sometimes, I like to create sketches of what I want the end product to look like; other times, I allow the image to sit in my brain as I cut and weave.
The next practical step after the planning and envisioning is to cut out and mark the stakes for your basket. I want to share how I do this.
You set yourself up for a successful and enjoyable weaving experience at the reed-cutting stage. I have a few pointers that will help you make your next project the best it can be.
If you need help interpreting your basket pattern, watch this video:
Find a complete list of basket weaving terminology:
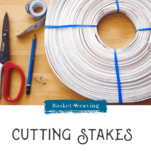
Basket reed cutting tools
- My favorite tool for cutting stakes is a pair of reed cutters or basket shears. They have a sharp, pointed blade that makes it easy to cut through even a thick, flat oval rim reed. Kitchen shears are a slightly less effective alternative.

- A cloth measuring tape for measuring the stakes. The pliability of the tape allows it to curve over the reed as you measure.
- A graphite pencil to mark the center point on each stake.
- Reed – the width you need for the basket.
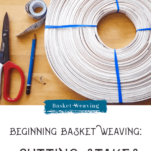
Removing pieces of reed from the reed coil

As you can see in the photo above, the reed is coiled and tied into a neat bundle.
To start cutting your stakes, these ribbon bindings have to be cut, obviously, but doing it willy-nilly will leave you with a huge mess (trust me, I know from experience).
Here’s my suggestion:
Lay your bundle on a table (like in the photo above). Then clip the ribbons, or whatever is fastening the coil, without moving the reed itself. The coil should look like the photo below.
Generally, on reed coils, a piece of round reed is twisted around the ends to hold them together. I clip this reed tie – still keeping the reed flat on the table.

Finally, remove a piece of reed from the loosened coil. Lift one of the visible ends on the outside of the coil and gently pull it out. Here is a photo of what your piece will look like:

After you have cut all the stakes you need and taken the pieces you want from the coil, retie the coil before moving it.
Retie at spaced intervals to keep the coil together. This is much easier to store than a tangled mass of reed that looks like a rat’s nest.

Measuring basket reed for stakes
Starting at the end of the reed, measure from the endpoint to the length you require and snip off the length with scissors.


Continue to measure and cut reed until you have the number of stakes for your basket design.
Since you have the basket, reed out, cut all stake lengths, the pattern calls for.
Make sure to keep the different lengths in separate piles in order to save time later. You may want to make a note on scraps of paper, indicating which part of the basket each bundle is meant for.

Do you want the best resources, tools, and products for fiber artists?
Every other Friday, I send an email chock full of fiber craft inspiration for you to explore.
Each issue focuses on one fiber art skill – spinning, dyeing, basket weaving…
Marking the stake center point
Find the center point of the stake length.
If I’m feeling math-sensitive, I use a cheat method to do this.
Find the length of your piece of reed on the measuring tape, fold the tape in half, and voila! There’s your halfway point.


Using the pencil, mark the wrong side of each stake (*see photo below) at the halfway point. Mark all the stakes.
*Wrong side: There’s a right and wrong side of the reed.
One side is smooth; the other has a fuzzy texture of little reed fibers. To figure out which side is which, gently fold the reed over your finger and look at the texture of each side. The side that is rougher is the wrong side.

Your reed stakes are cut and marked. Enjoy your new beginning, and good luck with pursuing adventures in basket weaving!
Basket tool kit
Check out the Textile Indie Shop for a tool kit that includes reed cutters, spoke weight, 4 metal clamps, 4 plastic clamps, and a straight-tipped packer.
Next step…
Now that your basket reed is prepared, you’re ready to create the base.
I have a couple of posts for you:
How to Weave an Open Base Basket
How to Weave a Closed Base Basket
And two videos:
For a complete guide to all Textile Indie’s basket weaving posts and videos, visit the main Basket Weaving Page.
More basket weaving techniques:
How to Weave an Open Basket Base
How to Weave a Closed Basket Base
Twining a Basket Base: Creating a Stable Basket
Weaving Techniques for Basket Making
How to Set Up the Rim of a Basket
How to do Basic Lashing on a Basket Rim
How to do Cross-Stitch or X-Lashing on a Basket Rim
Signing Your Handwoven Baskets: Leaving a Legacy
How to Protect Your Handwoven Baskets from Mold
Basket Stains and Sealers: Finishing Your Basket
Basketry Immersion: A Year-Long Journey
Check out Textile Indie’s self-paced basket program if you want to learn to weave beautiful baskets.
Twelve different basket designs with video and written instructional support to learn foundational basketry techniques.
Over the course of twelve months, you will receive one basket pattern and a video with supporting instructional material each month. Start at basket one and weave all twelve.