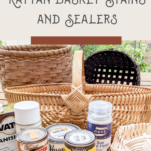
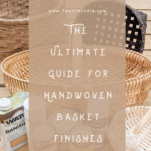
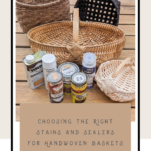
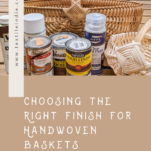
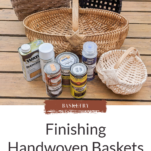
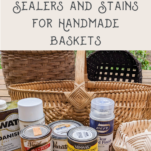
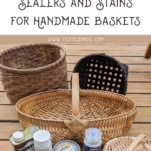
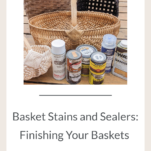
When it comes to finishing your handwoven baskets, understanding basket stains and sealers is crucial. This guide will walk you through everything you need to know.
(For a complete guide to all Textile Indie’s basket weaving posts and videos, visit the main Basket Weaving Page.)
To stain or not to stain…
Can you stain a basket?
Staining a basket is possible. There are many stains on the market in various wood tones and fashion colors that will alter the color of the reed. Weavers may decide to stain a basket to match a room’s decor or create color variety in a grouping of baskets.
Staining a basket is purely an aesthetic choice.
There are several different types of stains on the market. Shades range from natural (light wood) to mahogany (almost black).
If you choose not to stain your basket, use a clear matte sealer to protect your basket from dirt and oils. (See the ‘Sealing’ section below.)
To seal or not to seal…
Can you seal a basket?
Using the right basket stains and sealers can significantly enhance the longevity and appearance of your baskets. Let’s delve into the different options available.
It is possible and desirable to seal a basket. Staining baskets is an aesthetic decision, but sealers protect the reed from moisture, which can cause mildew and mold growing on a basket.
See my post, ‘How to Protect Your Baskets,’ for more about recovering a basket from mildew and mold in the event it does happen.
Another reason to stain your baskets is to protect them from dirt and oils. Sealers will seal the reed so that oils from your hands and other substances won’t wear away the integrity of the reed and seagrass.
In addition, the sealer will make it much easier to clean the basket if it does get dusty or dirty.

For a complete list of basket terminology:
Drying the basket for finishing
Why dry the basket before staining or sealing?
The weaving process requires the reed to stay damp. Allowing a basket to dry protects the reed from mildew and picking up dirt.
Slow drying a basket
Dry your basket in a space with lots of airflow. It’s preferable to allow the reed to dry naturally rather than with a hair dryer or placing the basket near a heater. Attempting to speed dry time may cause the reed to become brittle.
How long does it take to dry a handwoven basket?
A good rule of thumb is to dry your basket for 24-48 hours, depending on the humidity in your area. This will allow the thickest pieces of reed and the layers of the rim to completely dry.

Staining a handwoven basket
Choosing the right basket stain
You have two main options; a pure wood stain or a stain with built-in sealant.
You will also have a wide array of wood tones and colors to choose from. Visit your nearby home improvement store to see what’s available.
And be sure to select a water-based stain. Clean-up will be easier, and the smell will evaporate much faster.

Suggestions for basket staining success
First, I suggest testing the stain you choose on a piece of scrap reed before applying it to your basket to double-check that you like the result.

How to stain your basket
Supplies needed to stain
| Your basket |
| Stain of choice |
| Foam brush |
| Bristle brush |
| Drop cloth (workspace protector) |
| Well ventilated space |

Steps to staining your basket
- Lay out your drop cloth in a well-ventilated space, preferably outside.
- Gently stir the stain.
- Set the basket on the drop cloth. Beginning from the top, apply the stain with the bristle brush. This works best if you only dip the bristles about a 1/2 inch into the stain. Gently brush it back and forth over the basket.
- Continue to brush the stain over the entire surface area of the basket’s walls.
- Once the stain has soaked in enough that it doesn’t come off on your fingers, set the basket down on its side to coat the bottom with the stain.
- Repeat the same process to spread the stain onto the reed inside the basket.
- Using the foam brush, go over the basket, catch any drips, and mop up excess stain on the reed.
- Gauge whether you need a second coat by how much the reed soaks in the stain. If it soaks it up fast and the reed looks slightly dry, go for another coat. Otherwise, make sure you haven’t missed any spots.
- Let the basket dry according to the directions of the stain.

Using a spray stain
- Lay out your drop cloth in a well-ventilated space, preferably outside. You want to be working in a breeze-free area.
- Shake the can of stain according to the duration suggested on the can.
- Set the basket down on the drop cloth. Beginning from the top-down, apply the stain in a thin, even coat. Keep the can six inches away from the basket.
- Spray down the walls of the basket from the outside. If your basket has a handle, don’t forget to spray that as well.
- Next, spray the inside of the basket – work from one side of the basket, aiming the spray at an angle to hit the walls. Spray the inside bottom as well.
- Allow the basket to sit for about 10 minutes before turning it to one side and spraying the base.
- Follow the drying instructions on the can of stain.
- Spray stain smells, so leaving the basket outside until the smell goes away is a good idea.
Do you want the best resources, tools, and products for fiber artists?
Every other Friday, I send an email chock full of fiber craft inspiration for you to explore.
Each issue focuses on one fiber art skill – spinning, dyeing, basket weaving…
Sealing a handwoven basket
As I mentioned before, whether or not you stain your basket, sealing it once the basket is dry is a good idea.
A polyurethane finishing product will seal the reed from moisture, dirt, and oils.
Choosing the right basket sealer
Your basket is finished if you use a stain with a built-in sealant. Congratulations!
If not, select a clear, matte sealer to maintain the natural look of the basket.
Or go for something glossy or semi-glossy if you want to add shine to your reed. I suggest testing the sealer on a piece of scrap reed before applying it to your basket to double-check the finished result.
Part of the fun of basket weaving is creating a basket suited to your style and decor. Here are baskets finished with a clear finish sealer. This is my preferred finish because I like the reed’s light color and the seagrass’s accent against the natural tone. But this is a personal preference.


How to seal your basket
Tools and materials
| Your basket |
| Sealer of choice |
| Foam brush |
| Bristle brush |
| Drop cloth (workspace protector) |
| Well ventilated space |
Steps to seal your basket with a liquid sealer
- Lay out your drop cloth in a well-ventilated space, preferably outside.
- Gently stir the sealer you are using.
- Set the basket down on the drop cloth. Beginning from the top-down, apply the sealer with the bristle brush. Dip into the sealer about 1/2″ so the bristles don’t get gunky, gently brush it back and forth over the basket.
- Continue over the entire surface area of the walls of the basket.
- Do the same process to spread the sealer onto the reed inside the basket.
- Using the foam brush go over the basket and catch any drips or excess sealer sitting on the reed.
- Allow the basket to dry according to the sealers’ directions.
- Apply a second coat of sealer to the entire basket to ensure coverage.
- Allow to dry.
Steps to seal your basket with a spray sealer
- Lay out your drop cloth in a well-ventilated space, preferably outside. You want to be working in a breeze-free area.
- Shake the can of sealer according to the duration suggested on the can.
- Set the basket down on the drop cloth. Beginning from the top-down, apply the sealer in a thin, even coat. Keep the can six inches away from the basket.
- Spray down the walls of the basket from the outside. If your basket has a handle, don’t forget to spray that as well.
- Next, spray the inside of the basket—work from one side of the basket, aiming the spray at an angle to hit the walls. Spray the inside bottom as well.
- Allow the basket to sit for about 10 minutes before turning it to one side and spraying the base.
- Follow the drying instructions on the can of sealer.
- Spray sealer smells, so leaving the basket outside until the smell goes away is a good idea.
I’ve had success with this sealer from Amazon. You can also find an array of spray sealers at your local hardware store.

After the basket dries
Your basket isn’t complete yet!
There’s one more step.
Sign your basket.
Check out my post on different methods for signing handwoven baskets.
I would love to see your finished piece. Share your basket on Instagram and tag me @textileindie.
For a complete guide to all Textile Indie’s basket weaving posts and videos, visit the main Basket Weaving Page.
More basket weaving techniques:
How to Cut Reed for Basket Stakes
How to Weave an Open Basket Base
How to Weave a Closed Basket Base
Twining a Basket Base: Creating a Stable Basket
Weaving Techniques for Basket Making
How to Set Up the Rim of a Basket
How to do Basic Lashing on a Basket Rim
How to do Cross-Stitch or X-Lashing on a Basket Rim
Signing Your Handwoven Baskets: Leaving a Legacy
How to Protect Your Handwoven Baskets from Mold
Basketry Immersion: A Year-Long Journey
Check out Textile Indie’s self-paced basket program if you want to learn to weave beautiful baskets.
Twelve different basket designs with video and written instructional support to learn foundational basketry techniques.
Over the course of twelve months, you will receive one basket pattern and a video with supporting instructional material each month. Start at basket one and weave all twelve.