This post contains affiliate links. I could be an affiliate for many different products, but I chose these specifically because they are the products and brands I like and recommend. By using my links, you help support this website.
Hey there, fellow craft enthusiasts! Today, we’re diving into something fun and artsy: ice dyeing.
If you’re scratching your head wondering what this is, you’re in for a treat!
Imagine turning a plain, boring piece of fabric into an explosion of colors and patterns, and all you need is some ice and dye – talent is optional!
Ice dyeing is like tie-dye’s chill cousin (pun intended).
You sprinkle dye powder over ice cubes laid on the fabric, and magic happens. As the ice melts, it creates these marbled, watercolor-like designs. No two pieces will come out the same.
I love ice dyeing because it’s easy and incredibly forgiving. It’s the perfect summer project to introduce at a gathering and it’s doable for kids and adults.
In this blog post, I’m going to walk you through the whole process, from picking out the perfect dyes to setting up your dyeing station.
What’s the difference between ice dying and tie-dyeing?
Tie-Dyeing is all about precision and control. You twist, fold, or crumple the fabric, then bind it with strings or rubber bands.
Applying dye directly to these bound sections lets you create specific patterns like spirals or stripes.
The real magic of tie-dyeing lies in how you manipulate the fabric – the tied areas resist the dye, leading to clear, vibrant patterns.
Ice Dyeing, on the other hand, is an adventure into the unknown.
You cover your fabric with ice, then sprinkle dye powder on top. As the ice melts, it carries the dye through the fabric in unpredictable patterns.
It’s less about control and more about the dye surprising you with a completely unique look every time. The colors blend softly, creating a more organic and fluid pattern compared to the boldness of tie-dye.
How long is ice dyeing going to take?
Ice dyeing typically spans over a day or two.
You’ll start by spending 30-60 minutes preparing your fabric and setting up your dyeing space.
The bulk of the time, about 6 – 24 hours, is spent waiting for the ice to melt and the dye to transfer onto the fabric. You can go about your business. Ice melts faster if you don’t watch it. 😉
The next step is letting the dye set. This can take a few hours to overnight depending on the dye you use (as per manufacturer directions).
Finally, you’ll rinse, wash, and dry the fabric.
Most of the ice dyeing process is hands-off, just don’t expect to start at breakfast and wear that new t-shirt out to dinner later that night.
How to ice dye
Table of contents
Step 7: Rinse and wash the garments
Step 1: Gather your supplies

Tools needed to ice dye
- Salad spinner
- Skewers
- Nitrile gloves
- Spoon
- Measuring spoons (tsp)
- 4 cup liquid measuring cup
- Towel
- Plastic dish pan
- Metal measuring cup
Materials needed to ice dye
- Procion MX fiber reactive dye (or other fiber-reactive dye, we like Dharma Trading Co. Fiber Reactive Dyes)
- Cotton or linen fabric
- Soda ash
| Ice Dyeing Basics | Where to get it? |
| Salad spinner | Oxo Salad Spinner |
| Wooden skewers | Bamboo Skewers |
| Nitrile gloves | The Woolery Nitrile Gloves |
| Spoon | Spoon |
| Measuring spoons (liquid measure) | Dyers Measuring Spoons |
| Glass measuring cup | Glass measuring cup |
| Towel | Old towels |
| Dish pan | Dish Pan |
| Metal measuring cup | Metal measuring cup |
| Fiber Reactive Dye | Procion MX Fiber Reactive Dye |
| Cotton or Linen yardage | Fabric |
| Soda ash | Soda Ash |
| Dust Mask | Dust Mask |
Dyes and soda ash
 Buy Now →
Can I ice dye without soda ash?
I used a Soda Ash Dye Fixer to treat the fabric.
Yes, you can ice dye without using soda ash, but there’s a trade-off.
Soda ash is a fixative that helps the dye bond to the fabric, which creates more vibrant, long-lasting colors.
Without it, the dye may not adhere as well, leading to faded or washed-out colors after a few washes.
Additionally, the dye might not spread as evenly across the fabric, potentially resulting in less defined patterns.
While you can still achieve interesting effects without soda ash, the overall quality and durability of your ice dyeing project may be compromised.

Ice dye safety tip
All of the tools that come into contact with the dye should not be used for food afterward.
Keep a separate set of dyeing tools in your craft supplies so you don’t cross-contaminate your food.
I like to label all my dye tools with a permanent marker.
FAQ’s about dyes for ice dyeing
What are my favorite dye brands?
I like Procion MX Fiber Reactive dyes.
I used turquoise and cobalt blue Procion MX dye for this sample project.
Looking back, I probably would have picked a different color than turquoise. The light color didn’t create the same unique designs as the darker cobalt blue did. And the contrast between the two colors seems harsh to my eyes. But that’s my personal preference.

Can I use Rit Dye (liquid or powder) for ice dyeing?
Powdered Rit Dyes:
The powder is more suitable for ice dyeing because you can sprinkle the powder directly onto the ice, similar to how you would use fiber-reactive dyes.
Liquid Rit Dyes:
While not traditional for ice dyeing, you can experiment with them.
One method is to freeze the liquid dye into ice cubes and then use these colored ice cubes on your fabric.
The results will be less predictable, and the colors more muted compared to using powdered dyes.
The main difference between a fiber-reactive dye (like Procion) and Rit is that Rit Dyes do not chemically bond with fabric in the same way, especially in a low-temperature process like ice dyeing.
This means the colors will not be as vibrant or wash fast as those achieved with fiber-reactive dyes.
However, Rit dyes are readily available at craft and even grocery stores and can still produce beautiful results.
What is color splitting?
Color splitting in the context of fabric dyeing refers to the separation of different pigments within a dye, resulting in a range of colors showing up on the fabric, even though you started with one color.
This happens because many dye colors are made up of multiple pigments that react differently when applied to fabric.
In ice dyeing, color splitting is very prominent and can lead to stunning effects.
As the ice melts and the dye slowly dissolves and spreads over the fabric, the different pigments in the dye can separate and move at different rates.
This separation allows the individual pigments to be seen distinctly, creating a multi-hued, often unexpected pattern from a single dye color.
For example, a dye that appears blue might split into shades of blue, purple, and even green as it spreads across the fabric.
This phenomenon adds an extra layer of uniqueness and complexity to ice dyeing.
Each use of a dye can produce different results depending on factors like the fabric type, the temperature, the rate at which the ice melts, and the specific composition of the dye.
Color splitting is one of the reasons ice dyeing is so unpredictable and exciting, as it can reveal a whole spectrum of colors and patterns that you might not anticipate when you first apply the dye.
Step 2: Prep your workspace
Lay out your supplies on a work surface.
Dyes stain!
Protect your work surface with an old towel, or better yet, work outside.

Step 3: Set up your project
Treat your garment or fabric with the required amount of Soda Ash Dye Fixer.
Let the fabric sit in the tub of water/fixer mixture for 15 minutes before taking it out and squishing out the excess water.
Do you ice dye on wet or dry fabric?
In ice dyeing, you want to start with damp or wet fabric.
Pre-wetting the fabric ensures even and improved dye penetration and better color blending.
Before applying the ice and dye, simply soak the fabric in water and then wring it out so it’s damp but not dripping. This preparation step is crucial for achieving the unique, flowing patterns that make ice dyeing so distinctive and appealing.
Of course, if you already soaked your project in soda ash water, you’re good to go.
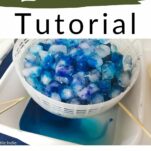
Put the fabric on a tray that has slots in it (to allow the ice water to drip through).
I used an old salad spinner bowl propped up with skewers.
You can also repurpose a stove grate, metal cooling rack, or anything that will allow the melting water to run freely.
Place whichever contraption you choose into or over the water tub.
Arrange the fabric by folding, bunching, or crumpling in any arrangement. This is where your creative vision takes shape.
You can’t go wrong here, so relax and have fun with it.
Step 4: Add the ice
Pile ice over the fabric.
One layer of ice is sufficient.
You do want to cover the fabric as much as possible to prevent the dye powder from falling directly on the fabric.
But again, there isn’t a wrong way to do this.
Step 5: Add the dye

Sprinkle dye over the ice.
I sprinkled on cobalt blue and then turquoise until the ice was practically covered.

Step 6: Let the ice melt
Allow the ice to sit on the fabric until it has completely melted.


I will tell you one thing! Waiting for the ice to melt is challenging.
It’s definitely the hardest part of the whole project! Patience grasshopper!
How long to let the ice dye set?
You need to allow the dye to sit on the fabric for 24 hours to allow it to set.
Set time can vary by dye manufacturer, so verify the set time on the dye package. But if in doubt, wait 24 hours before rinsing, and you’ll be golden.

When all the ice has melted and it has sat for 24 hours (this time starts as soon as you put the dye on the ice) lift the bowl or tray out of the water tub and place it in the sink.
Step 7: Rinse and wash
Rinse out all excess dye.
This can take a while as the dye is essentially sitting on top of the fabric. Be patient and rinse until the water runs clear.
Is it better to rinse with hot or cold water?
During the initial rinse, it’s better to use cold water.
Cold water helps to prevent the dye from bleeding.
Hot water, on the other hand, can open up the fibers of the fabric and cause more dye to be released, leading to a loss of vibrancy and definition in your patterns.
Wash and dry process
Finally, run your fabric pieces through a wash-and-dry cycle in your washer and dryer.
When you wash your ice dye project for the first time, it’s recommended to use a mild laundry detergent.
This initial wash removes excess dye that hasn’t bonded to the fabric.
Using detergent helps to ensure that all unattached dye particles are washed away, preventing them from staining other parts of the fabric or future laundry loads.
However, there are a few things to keep in mind:
- Use a Gentle Detergent:
Choose a mild detergent that’s free from bleaching agents or fabric softeners, as these can affect the dyed fabric’s color and texture. - Wash Separately:
Wash your dyed item on its own (the first time) to avoid any dye transfer to other garments. - Cold Water:
Use cold water for this first wash. Hot water can cause the dye to bleed more. - Gentle Cycle:
Opt for a gentle wash cycle to prevent excessive agitation, which can cause the colors to blend or fade.
My ice-dyed fabric samples
My finished pieces turned out vibrant and defined.


I hope you try using this technique. It’s a lot of fun, and the outcome is such a surprise. Enjoy!
Related Posts:
I’ve made several videos on ice dyeing projects – we ice-dyed baby onesies at my sister’s baby shower, made t-shirts and socks with my young cousins, and I custom dyed linen curtains from IKEA – to name a few projects.
Also, check out the ICE DYEING page where all the Textile Indie ice dye information lives.